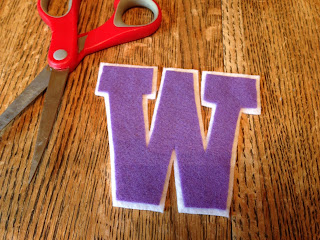
I married into a family who are massive University of Washington fans. No, none of them went to school there, but if you care about collegiate athletics - especially football - liking the Huskies is just something you
do on this side of the
Cascades.
Years (and years) of season tickets and general fan-demonium have stuffed the hubs' closet to the brim with Udub paraphernalia, and I'm coming up right behind him. But what to do when you go to, say, one game a year and don't feel like shelling out $30+ for a t-shirt with a W on it? With my parents coming up to attend a game with us this week, that question begged to be answered.
Enter (
trumpets!): How to DIY your own logo gear with felt.
Most logos are pretty easy to re-create by looking at a picture and having a ruler handy (that was my approach), but a more complex outline could be easily managed by searching Google Images and printing/cutting out a paper pattern to trace onto your felt. If you're computer savvy, you could even size the logo differently before printing and snipping to accommodate your needs.
 |
| I should have done it on paper, but this is what I used as my pattern. |
I just tacked my layers together with a thin bit of glue, but a contrasting
whip stitch around the edges would be adorable if you have the time.
I'll be stitching
pin-backs on these guys so they can be taken off and on whatever hat/shirt/jacket they land on, but a more permanent solution would be to adhere them to your surface with stitching. With felt costing 30 cents or less a sheet, this is about the cheapest logo gear you could possibly hope for. Support your team in style and on the cheap!
 |
| Just enhancing the real world application with the dog hair-coated jacket. You're welcome. |


No comments:
Post a Comment
I love hearing what you have to say, but comments including spam links will be deleted.