Showing posts with label Recipe. Show all posts

1.28.2015

Hawks Pox

I'm telling you, it's a sickness. The whole state of Washington is Seahawk cuh-ray-zee, and we're getting pretty much nothing but Superbowl prep coverage from tv news to radio to print. So I'm jumping on the crazy train (no, not the bandwagon, I'm already a fan thankyouverymuch) and offering up a compilation of my own game day goodness goodies.

Patriots fans, look away.
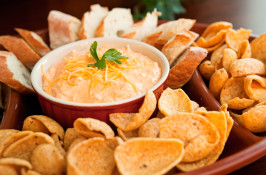
What's Superbowl Sunday without decadent snacks?! My go-to for any and every gathering is Buffalo Chicken Dip. It's hearty, tasty, and I've legitimately never met anyone who doesn't like it.
Crock Pot Buffalo Chicken Dip. Photo by CulinaryExplorer
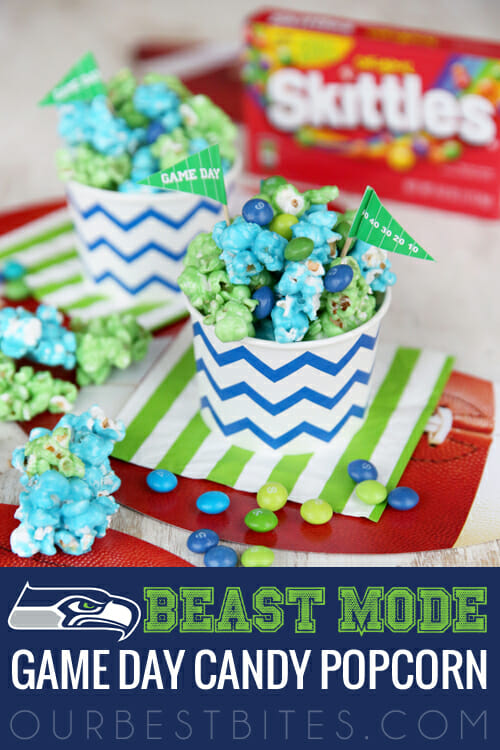
If you want some color, I think I'm going to try out this Hawk Corn, created by the ladies of Our Best Bites. Blue and green candy corn with a Skittles chaser? Yep. Beast Mode: Engage.
Seahawks Superbowl Popcorn from Our Best Bites
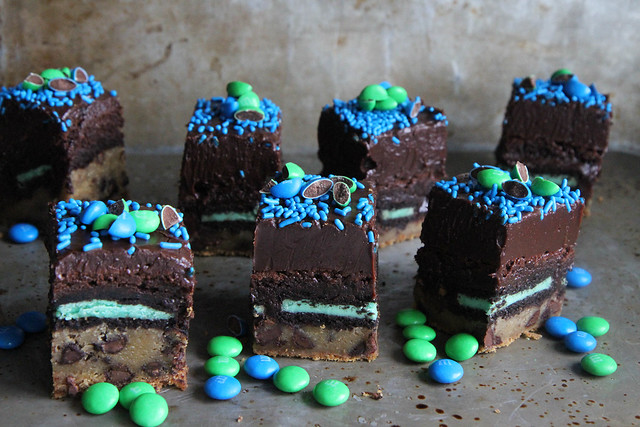
More of a chocolate-based sweet snacker? Check out this toothsome treat that piles (get ready) M&Ms on frosting on brownies on oreos on chocolate chip cookie, all with a dash of peppermint thrown in. And again I say: Yep.
Superbowl Slutty Brownies
I've also been thoroughly entertained by the memes floating around the interwebs lately. Nate and I are in a constant group text with some friends and these visual gems have been flying thick and fast.
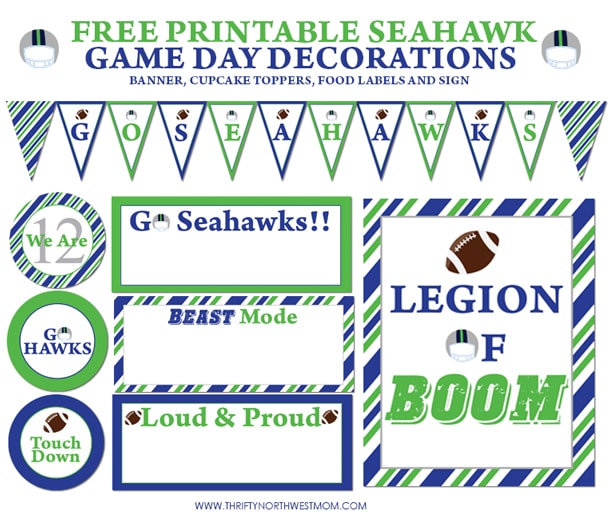
Last but not least, check out this post from Thrifty NW Mom for some free printable Seahawks decorations you can use on game day. Or take some inspiration and whip up your own!
Free Printable Seahawks Game Day Decorations
Above all... Go Hawks!

10.03.2014

Easy Upgrade: Truffle-Stuffed Cupcakes

Wanna get some major oohs and ahhs without much extra effort?
Spoiler alert: For me, the answer to that question is always, always YES. So, shot in the dark, I'm guessing you're on board. Plus I'm about to say the words truffle-stuffed cupcakes, so now you're hooked for certain.
Nothing extra to bake or stir here, just two little tricks that make that box of cake mix transform. First, bake your cupcakes as normal. Then, when they're coming fresh out of the oven (i.e. still piping hot), take a sharp knife and cut a small 'x' in the top of each cake. Try not to hit the bottom of the pan, but slice as deep as possible. Then, unwrap that truffle and stuff 'er in. Like so:
Next trick? Once the cupcakes are completely cooled, grab a spatula and a sandwich bag. Scoop your frosting out of the can (or okay, if you go by Ms. Crocker, scoop it out of the mixing bowl) and into the bag. Seal it closed, getting as much air out as possible. Snip off one corner, about the size of a dime. With one hand firmly grasping the bag, squeeze the frosting out of the cut corner in a circular motion on each cupcake. 
You'll probably take a few to experiment with pressure and speed, but you'll just be forced to eat the 'mistakes'. Shoot.

The frosting will cover the hole, so that problem is now solved. Dust with sprinkles, especially if you're using chocolate frosting. Because you don't want any allusions to, well, you make your own assumptions about what a pile of chocolate frosting looks like.
Each time I make these I get asked where I bought them, followed up by an incredulous look: "Wait, you made these?!" They're great with any flavor of cake and any flavor of truffle. I can't wait to do mint chocolate for the holidays... Enjoy the compliments and the deliciousness!

2.19.2014

Pancakes Gone Wild

It seems like since I've entered into my new job position, I've had to whip something up to bring for a potluck almost every week. It's kind of a drag sometimes, but it's forced me to expand my "what's easy that I can make with minimal ingredient purchases" repertoire. Which, coincidentally, works out pretty well for you guys.
My cookies, pre-office chow down.
These cookies discovered on Pinterest are one of the most delicious things to come out of my kitchen in a long while. Blueberry White Chocolate - The combo sounds alright, but when you taste 'em all wrapped up in a cookie... It's like the most decadent blueberry pancake you've ever dreamt of.

The cookie itself is super straight forward - Pretty much what you would make for a basic chocolate chip cookie. Except forget the chocolate (I know, I can't believe I'm saying that either), and toss in blueberries (I used straight up frozen right out of the bag) and white chocolate. DO IT.

A big thank you to Megan Myers at Stetted.com for this recipe. She's a genius, I tell ya. A genius.

FYI: I used 3 cups of all-purpose flour, omitting the 1 cup of whole wheat pastry flour. A friend tried them the way the recipe calls for, and got a slightly different result.
All all-purpose: Tastes like pancakes.
Following the recipe (2c. all-purpose, 1c. whole wheat pastry): Taste like muffins.
Both delicious.

Blueberry White Chocolate Cookies
Prep: 15 minutes   ~    Cook: 12 minutes   ~   Makes: 3 Dozen-ish
Ingredients
  • 1 cup unsalted butter, softened
  • 1 cup granulated sugar
  • 3/4 cup brown sugar
  • 2 eggs
  • 2 teaspoons vanilla
  • 2 cups all-purpose flour
  • 1 cup whole wheat pastry flour (or 3c. all-purpose and no whole wheat)
  • 1/2 teaspoon baking soda
  • 1 teaspoon salt
  • 2 cups white chocolate chips
  • 1 1/2 cups blueberries, washed and patted dry (In Knots Note: I used frozen still frozen. No patting.)
Instructions
  1. Preheat oven to 350°F and line baking sheets with parchment paper.
  2. Cream together butter and sugars until light and fluffy. Mix in eggs and vanilla. In a separate bowl, sift together flours, baking soda, and salt. Stir into wet ingredients.
  3. Stir white chocolate chips into dough, then add blueberries, taking care not to mash the berries much.
  4. Scoop dough onto baking sheets. Bake for about 12 minutes, until browned on edges. (In Knots Note: I scooped heaping tablespoon size.)
They're so quick. Make 'em right now and just try to tell me you didn't eat them all in 2 days. Honestly, I was glad I made them for work where they'd not all disappear into my belly.

1.24.2014

Da [chocolate cherry] Bomb

Yep, tryin' new things in the new year. This time: Chocolate Cherry Brownie Bombs. You pretty much can't go wrong with a name like that, right?
image
I've been intrigued by cake pops since they started gaining popularity a few years back, but I've never screwed up the courage motivation to give 'em a go. These are kind of a hybrid - Perfect for a first timer because if they turn out ugly, they're getting covered by chocolate anyway, and no sticks to deal with either. Win.
Score: Fresh brownies in the bowl, the crunchy crust for me!
Shout out to the amazing Lisa of WineAndGlue for coming up with this gem. They're hitting a work baby shower (are these kids raining from the sky, or what?!) today... Here's hoping they're as tasty as they look!

Chocolate Covered Cherry Brownie Bombs (as seen on WineAndGlue.com)
  • 1 box of brownie mix and the fixin’s it takes to make them
  • 1 can of chocolate frosting
  • 3 to 4 cups of milk chocolate chocolate chips
  • 1 can of cherry pie filling
  1. Bake the brownies as directed and let cool completely.  Do not overcook the brownies, crunchy brownie bits don’t make for good bombs.
  2. Crumble the made brownies and mix in about 3/4 a cup of chocolate frosting.  If you’ve made cake pops before, you want a similar consistency.  You may need to add a little more, but you want to start out on the low side and add more if you need it.
  3. Once you have it the consistency needed (stays together easily but isn’t too sticky to roll into balls), start with about 1 TBSP of brownie frosting mixture.  Form it into a ball, but then make a hole in the middle that you can drop one cherry from the pie filling into.
  4. Top with a little more of the brownie/frosting mixture and do your best to seal the cherry in.
  5. Once you have all your bombs made, pop them in the freezer for about 20 minutes.
  6. While they are hardening up in the freezer, melt your chocolate.  You may need a little more or a little less depending on how heavily you coat the bombs.
  7. After the 20 minutes, take them out of the freezer and keep them in the refrigerator.  Working one bomb at a time, drop it into the melted chocolate, pull it back out, and tap off the excess chocolate.
  8. Place it on wax paper and wait for it to dry completely.
*FYI: I used a 'family size' box of brownie mix in a 13x9 pan, followed the directions in the recipe, and got about 20 bombs. Also: Mine are not perfect, shiny little bon-bons like the ones in Lisa's picture, but dang it, they're not bad for a first timer!

1.03.2014

Top 5 of 2013

First: Thank you!
Yep, you. The one reading this right now. Thanks for reading this - and numerous other ramblings - over the past 12 months. Feel free to be liberal with the back patting, you deserve it!

I thought it would be fun to take a glance backwards before we dive headlong into 2014, so here are my five posts from twenty-thirteen that garnered the most traffic. The posts that Y-O-U chose as the best!

I never know quite what will ring people's bells, but perhaps it's the what-to-buy list in this post. I must say, every product and technique used in this guy will be used a great deal more in the new year!

Yep, this one I get. Because the plum cake recipe included in this post is the bomb dot com.

Stop, I'm blushing. My Crowdtap blog shoutout landed the #3 most popular post of the year.

Warm my heart, why don't you! Any time my attempts to raise money for Type 1 Diabetes research garner attention I couldn't be happier. Here's hoping you all donated at Walgreens and - shameless plug - are about to hit up www2.jdrf.org right now to donate to Team Ella of Minnesota.

#5: Ottoman Reupholstering: Bottom and Lid/Results
Such a fun, easy, and totally transformative project. My 'new' ottoman is still happily installed in our family room collecting compliments and loving gazes.

Can't wait to see what you all choose to be the most popular of 2014!


12.18.2013

Hot Cocoa With A Twist

Have I got a cookie recipe for YOU.

Fair warning: Don't read this if you don't need a new addiction.

Mexican Hot Chocolate Cookies. Know what that means? Chocolate, cinnamon, more chocolate, and yes, marshmallows. I tested 'em this past weekend and they received rave reviews both at home and at work, making them a shoo-in for our Ugly Christmas Sweater Party this weekend.
image
My cookies, ready to go in! Make sure they're COLD.
Shout out to the Frugal Foodie Mama for this recipe - Here you go!
Ingredients (32 cookies)
  • 2 1/4 cups all-purpose flour
  • 1/2 cup unsweetened baking cocoa
  • 1 tsp baking soda
  • 1/2 tsp salt
  • 1/2 tsp cinnamon
  • 1 cup butter, room temperature
  • 1 1/4 cups brown sugar, packed
  • 1 cup sugar
  • 1 teaspoon vanilla
  • 2 eggs
  • 1 cup chocolate chips
  • 1 cup mini marshmallows, frozen
Instructions
In a medium bowl whisk together the flour, unsweetened cocoa, baking soda, salt and cinnamon. Set aside.

In a large mixing bowl, cream the butter, brown sugar, and regular sugar until creamy.
Add in the eggs one at a time and beat until light and fluffy.
Then beat in the vanilla.

Slowly add in the flour mixture to the wet mixture and mix until just combined.
Stir in chocolate chips and frozen marshmallows.
Refrigerate the cookie dough for 1 hour.

Preheat your oven to 375 degrees. Line a baking sheet(s) with a silicone baking mat or parchment paper. Set aside.

Drop tablespoon size balls onto the prepared baking sheet spaced about 1 inch apart.
Bake for 8-10 minutes.
(In Knots note: The cookies will come out looking MUCH better if they're as cold as the fridge when they go in the oven. Don't pre-prep your cookie sheets with dough unless you're keeping them in a cold place!)
Allow to cool on baking sheet for 5 min then finish cooling on a wire rack.

*Frugal Foodie Mama notes the original recipe can be found here

Enjoy, everyone! Happy holiday baking.

10.04.2013

All About Autumn

My dearest Emily made the trek up from Portland this past weekend with crafting on the brain. Her requests: To make something and to bake something. After a trip to Michael's and the grocery store, it was a two birds kind of situation.
Wandering Michael's.
We whipped up the batter for our Apple Cinnamon-Sugar Cookie Bars with Brown Butter frosting, and while those were in the oven, worked on our fall wreaths.
Em went with a fall leaves theme and I went the more floral route. I love them both, and we got a kick out of how different they ended up.
My components, snipped apart and ready for action.
Em eyballing floral placement options.
How'd we make 'em? Simply a styrofoam wreath form and a pile of fake flowers, all snipped apart into individual blooms/leaves/foliage with a pair of wire cutters. Then all you have to do is poke the wire 'stems' into the styrofoam. Done!
Em's fall color fiesta - Leaves, berries, beauty!
Mine, already taking the spot of a spring-y-er wreath inside the door.
As for those ridiculously good bars and frosting (from LemonsForLuLu with notes from me):

For the bars:
1 C butter, softened
4 eggs
2 tsp vanilla
5 C flour
1tsp salt
1/2 tsp baking soda
2 C diced, peeled apples
2 tsp cinnamon

For the frosting:
1 C browned butter
16oz. powdered sugar
1/2 C milk
1 tsp vanilla

I recommend browning the butter first thing as it needs to sit in the fridge for an hour before making it into frosting. So get browning! Then:
Preheat your oven to 350° and grease a 13x18 cookie sheet (I use the butter wrappers for this). In a mixer (or with a hand mixer), combine butter and sugar and mix on medium speed until creamy. Mix in the eggs one at a time, making sure to mix well after each addition. Mix in vanilla, scraping the sides of the bowl as needed. In a separate bowl (I know, I hate that too but it's important), combine flour, salt, and baking soda. Blend in flour mixture on low until completely incorporated. Pop into the oven for 15-20 minutes or until a toothpick test in the middle comes out clean.
Now about that frosting. Get your browned, now-solidified butter out of the fridge and drop it into a mixing bowl. Beat it until smooth. Carefully add powdered sugar alternately with the milk, beginning and ending with powdered sugar (translation: sugar, 1/4C milk, sugar, 1/4C milk, sugar.) Once the frosting is a spreadable consistency, mix in vanilla.
Wait until the bars are COMPLETELY COOL (really. I mean... really.), then spread the frosting over the bars. Ready, set, indulge.

9.05.2013

Back Yard Yield

It's a backyard mini-harvest 'round here. What is it that's so magical about walking into your own yard and picking a fresh snack? I don't know, but I love it.
The tomatoes I can't keep my hands off of, but there are too many plums to just hork down... What to do? Why, plum coffee cake of course:
It may not look spectacular, but I can't even tell you how good it is. So! Make your own (recipe via BigOven.com - I use the app and use it all. the. time. Go download it immediately.):

Ingredients:
1/4C margarine
3/4C sugar
2 eggs, separated
1 1/2C all-purpose flour
1 tsp baking powder
1/2C skim milk
2C halved and pitted ripe plums (that's about 10 plums if they're the small,
                                                            backyard-tree kind I use)

Topping:
1/2C packed brown sugar (dark is best)
1 tbsp margarine
1 tsp cinnamon

How-To:
Preheat oven to 350°.
Grease a 9 inch pan. Cream together margarine, sugar, and egg yolks until fluffy. Combine flour and baking powder; beat into egg mixture alternately with milk. Beat egg whites until stiff but not dry; fold into batter. Turn into prepared pan. Arrange plums over top.
Combine topping ingredients brown sugar, margarine, and cinnamon. Mix well (aka: squish it up with your fingers) and sprinkle over fruit. Bake 35 to 45 minutes until top of cake is lightly browned and fruit is soft.

Delicious warm, cold, or anywhere in between. Have at it, kids. Enjoy!


4.12.2013

Eat Food, Not Crap

...Seems like a pretty acceptable mantra, eh?

I found this picture on my Facebook feed a couple weeks ago, and it's such a great mnemonic device that I just had to share. Hope you find it handy and interesting too!
If the text isn't clear:
C - Carbonated Drinks
R - Refined Sugars
A- Artificial Sweeteners & Colors
P - Processed Foods

F - Fruits & Veggies
O - Organic Lean Protein
O - Omega 3 Fatty Acids
D - DRINK WATER (seriously folks, it'll cure what ails ya.)

2.15.2013

Just Brew It

How do you properly ring in your 30th year of life? By brewing your own beer, of course! We grabbed a gang of friends and reserved a kettle at a local brew-your-own place, and it was such a good time. Really. I don't even like beer and it was fun. Check out the process:

First the Birthday Boy got to choose a recipe from the archives. He landed on a Belgian White Bier, which brings in the flavors of orange and coriander (think Blue Moon if you're a brew-lover). And away we went!
Glucose. Not so appetizing, but necessary.
All kinds of dry flavor ingredients - Others were refrigerated or liquid, like the glucose above.
Measuring and then grinding the grains.
Our friend Adam with one of two drawn ingredient pitchers.
In go the coriander and orange in a separate mesh bag.
Dry ingredients added at specific times.
Once the kettle hit it's alotted time, the pros did something with all these...
...and then the whole shebang went in a keg to ferment. Yum..?
The whole process took 2 hours start to finish, and we go back to bottle and tote it home in two weeks time. There was a pleasant amount of time between each batch of ingredients being dropped into the kettle, allowing our group to chat, taste the brews on tap (including an amazing root beer for me!), and just generally enjoy eachother's company.

And even though I won't be partaking in the results, it was pretty fascinating to see all the ingredients in their various forms knowing what the end result would be. The place we went also offers wine and hard cider brewing, and we had so much fun the chances are good we'll be back! Highly recommend finding something similar in your own neck of the woods next time you want a new, fun experience for you and your pals.


Jump ahead to two weeks later and check out the bottling process here.

12.31.2012

A Dish Best Served... Never.

I married into a wonderful family with a rather horrifying tradition: Lutefisk.

What's that? Well, you can click on the word 'lutefisk' above for the real definition, but I'm pretty partial to Jeffrey Steingarten's synopsis during a 1999 interview:

"Lutefisk is not food, it is a weapon of mass destruction. It is currently the only exception for the man who ate everything. Otherwise, I am fairly liberal: I gladly eat worms and insects, but I draw the line on lutefisk.
What is special with lutefisk?
Lutefisk is the Norwegians' attempt at conquering the world. When they discovered that Viking raids didn't give world supremacy, they invented a meal so terrifying, so cruel, that they could scare people to become one's subordinates."
Nate's family calls it "Christmas Fish"... as if that makes it any cuter. Don't believe it could be so bad? Check out this little Christmas Eve plate action filmed from the plate of yours truly:
Any strange-but-true food traditions in your family? Tell me I'm not alone here!

11.20.2012

Magic Muffins

Lately I've been seeing a lot of recipes floating around Pinterest that proclaim the magic of canned pumpkin. This isn't news to me, really, as my mom's Pumpkin Chocolate Chip cookies have been an autumn staple for my friends and I my whole life.

But this new 2 ingredient movement was intriguing: One box of cake mix, one can of pumpkin, done.

Really? I decided to try it.
One giant can of pumpkin and two boxes of spice cake mix later (go big or go home), I'm sold. Next up: These pumpkin brownies I've been hearing about. One box of brownie mix, one can of pumpkin.
I did have to bake the muffins about 5 minutes longer than what the spice cake box said to to reduce the moisture, but I don't know if that was due to the use of pumpkin or me adding all the raisins I threw in. Either way, the benefits of pumpkin and getting to eat cake for breakfast?  Yep.

Kind of perfect for Turkey Day morning, eh?